How to Make DIY Christmas Ornaments
Along with Christmas photo books and photo cards, make your holiday season truly special by creating DIY Christmas ornaments your family can cherish for years. You don't have to stick to traditional painted glass bulbs, either (although you should add a few to your collection because they're a great way to capture kids' art abilities and showcase your own). Check out this list of DIY Christmas ornaments you can put together in your own home.
DIY Christmas Ornaments: The Basics
Some of the most popular homemade Christmas ornaments include:
1. Painted glass globes
2. Salt dough ornaments
3. Embroidery hoop wreath ornaments
4. Mini Ball jar + tea light ornaments
5. Clay ornaments
6. Filled glass globes
7. Open-front ornaments
Let's take a closer look at each (and how to make them).
DIY Ornament #1: Painted Glass Globes
Painted glass globes are truly unique - no two will ever be the same. This is a kid-friendly task, though you may need to provide some adult support.
What you need:
• Clear glass (or plastic, if you prefer) globe ornaments
• Acrylic paint
• Rubbing alcohol
Pop the top off each ornament you intend to paint. Pour a capful of rubbing alcohol in each and swirl it around to clean out the inside of the ornament, then allow it to dry.
Squirt paint into an ornament, making sure it drips down the inside of the glass. If you're using more than one color, you can turn the ornament and repeat the process - and keep doing it until you're done with colors. Don't overdo it on the paint, though; you only want to use enough to cover the inside of the glass, not create a pool at the bottom. If there are bare spots in the glass, gently turn the ornament until they're covered with paint.
When you're done painting, turn the ornament upside-down over a small container to let the excess paint drip out.
Bonus Tip: When the paint drips out and dries, gently remove it from the bottom of the container. Poke a hole in it and you have an extra (and fabulously unique) ornament for your tree.
DIY Ornament #2: Salt Dough
Bake your own salt dough ornaments in an hour, then decorate them however you'd like.
What you need:
• 4 cups all-purpose flour
• 1 cup salt
• 1.5 cups warm water
Heat your oven to 325 degrees F and mix the flour and salt. Gradually add water, mixing with your hands until it's soft and pliable. Roll the dough on a floured surface so it's about 1/8-inch thick and cut with cookie cutters. Bake for about an hour (until the dough hardens) and decorate with paint and embellishments.
DIY Ornament #3: Embroidery Hoop Wreaths
Embroidery hoop wreaths are a charming addition to any Christmas tree - and they're really easy to make.
What you need:
• Small embroidery hoops
• Holiday patterned fabric
• Embellishments
• Hot glue
Cut your fabric to match the size of your hoop's inner circle and set it aside. Then, place a larger piece of fabric between the hoops so it's covering the smaller hoop. If you intend to embroider the fabric, now's the time - but if not, flip the hoop over and trim it so you have about 0.5 inches of overhang around the edges. Use hot glue and tuck in the excess. Glue embellishments around the hoop to cover it up (a small lightbulb garland works great), then hot-glue the small circle of fabric you cut in the first step to the back of the ornament.
DIY Ornament #4: Mini Ball Jar + Tea Lights
Mini Ball jars with tea lights inside are a beautiful addition to elegant Christmas trees. They're so easy to make that you can knock out a dozen of them in no time!
What you need:
• Mini Ball jar (or even a baby food jar)
• Daisy lids
• Metallic paint
• Elastic ribbon
• Tea lights
Paint the daisy lids in metallic paint, which will look great with your Christmas lights. Loop an elastic ribbon through the center of the lid once it dries, place a tea light inside, and you have an instantly lighted ornament.
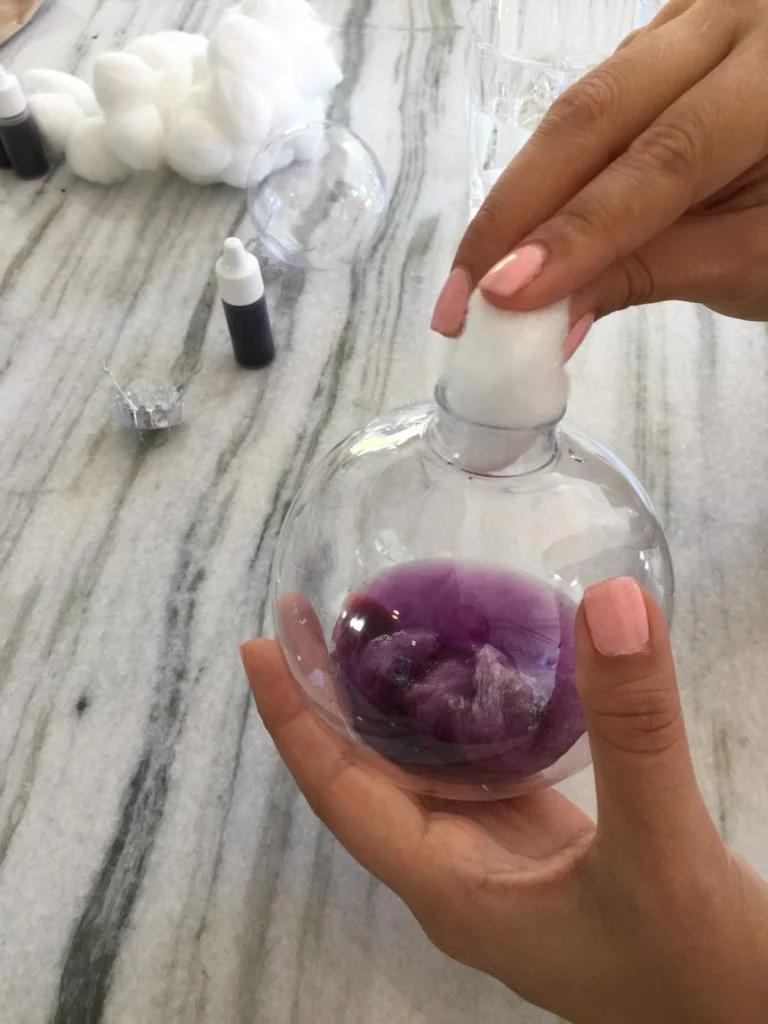
DIY Ornament #5: Filled Glass Globes
DIY filled glass globe ornaments can add a bright, colorful splash to your tree. You can fill them with anything you'd like, but sprinkles and glitter are our favorites.
What you need:
• Glass or plastic ornaments
• Filling
• Liquid varnish
Pour enough liquid varnish into a glass or plastic ornament to cover the inside; gently swirl it around until it's coated. Then, pour in your filling and shake gently. If you have bare spots, add more filling, and if you have too much filling, pour it into your next ornament. Give your ornaments an hour to dry, put the tops back on, and enjoy!
Have You Made Your Own DIY Christmas Ornaments?
If you've made your own DIY Christmas ornaments, we'd love to see how they turned out. Share your photos with us on Instagram (we're @Mixbook) or drop a link in the comments below so you can inspire us and our readers!
Related Christmas Products
christmas photo books, holiday photo album, christmas photo card template, seasonal photo books, personalized holiday photo card
Related Christmas Post
diy christmas and holiday card frame, diy galaxy ornaments, 5 fun diy projects to try